Summer STEMspiration – energising young minds with National Grid
Harnessing the power of play with seven boredom busting activities
School may be out for the summer, but how can you keep the kids entertained throughout the holiday? At National Grid, we’ve come up with seven awesome STEM-based activities that will spark their curiosity and creativity, with a smidgen of education, and all using everyday household items.
Science, Technology, Engineering and Mathematics (STEM) isn’t just for school. It’s the building blocks of innovation and discovery and can be explored in fun and exciting ways with simple experiments and challenges.
We’ve also teamed up with FunKids to offer a £100 Lego voucher for the best pylon design as part of activity one. Find out more on the Fun Kids website.
Fergus Hynd, UK senior manager for social impact at National Grid said: “Play is a powerful way to learn how things work and to spark curiosity and creativity. At National Grid we want to inspire more young people to pursue STEM careers and what better way to explore the world than with fun and engaging games and activities.”
Liat Hughes Joshi, author of parenting books, including How to Unplug Your Child (Summersdale/Vie), said: “Many mums and dads struggle to keep their children occupied over the long summer holidays and are often juggling work and parenting. It’s fantastic that the team at National Grid have come up with these ideas which are both engaging and educational. You never know, they might even inspire kids into a career in STEM in a few years’ time...”
Here are some examples of some tried and tested activities that you can do with your kids this summer:
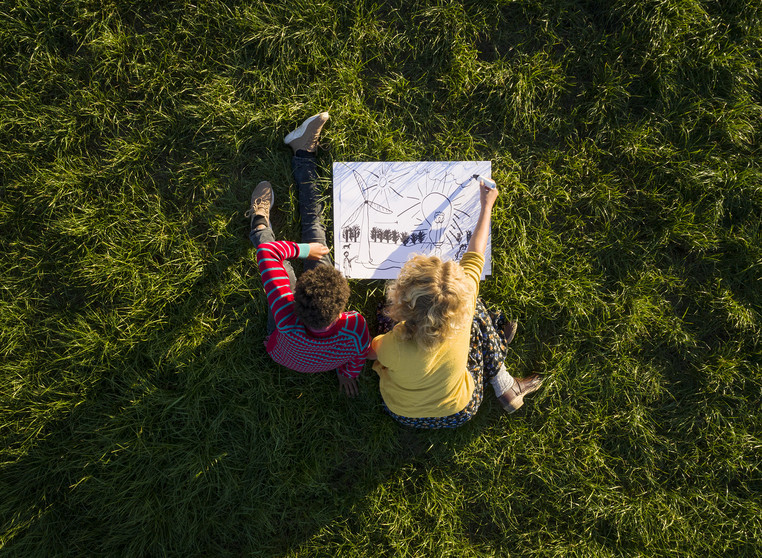
1. Construct a tower with everyday items
What you need: anything you have around the home. We tried with spaghetti, marshmallows and string.
Challenge: Build the biggest and/or the most extravagant tower, using materials from around the home. Be as creative as you like. We built an electricity pylon and then used sugar laces as power lines.
What they will learn: children not only build an understanding about different materials and their properties, but also how forces such as gravity, temperature and load impact building structures. It’s a great problem-solving activity.
2. Bubble sock
What you need: a large plastic bottle (1.75l – 2l), a sock, washing up liquid and some water.
Challenge: take your plastic bottle and cut it three quarters of the way down, leaving just the spout and around a ten cm of the bottle. Grab an old sock and pull it onto the cut end of the bottle, leaving just the mouthpiece clear of material. The toe section of the sock should be tight against the cut end.
Fill a small basin with some water and squirt in some washing-up liquid – 6:1 ratio should be adequate. Soak the end of the sock in the bubble mix, remove from the bowl and blow through the mouthpiece. Watch your bubble sock appear.
What they will learn: when we mix liquids and materials together, it changes the way that they behave. The bubble solution is a liquid, but when it’s blown through the sock, its properties change, and it becomes a gas.
3. Racetrack
What you need: an old carboard box, some scissors, pens and some toy cars
Challenge: take your old cardboard boxes and cut a long straight run and paint or draw on some lanes. Children also love to decorate them! It can be as long or as short as you want. Prop up the cardboard at one end, and let the kids race their cars to the bottom.
For an added dimension, you can also draw a target on the ground with circles depicting a different score. Every time the car rolls into the target, the children need to log the number and total up the score at the end to win.
What they will learn: children will be using basic physics in this activity with forces such as speed and motion. Ask the children to observe the impact of different inclines in the slope and why certain car shapes perform better. If the children are competitive, you can also keep track score using basic addition and multiplication.
4. Stone sundial
What you need: four large stones, a felt tip pen or market and a stick.
Challenge: collect four large stones about the size of the palm of your hand. Write the number 12, 3, 6 and 9 on to each stone and decorate. Head into the garden or park and find a stick around 30cm long. Find a spot in the sun, with no shadows and place your stick in the ground. At 12 noon and using a clock as a reference point, place the number 12 stone under the shadow of the stick – the shadow will be facing south, and you can now plot the other numbers. The three should be at 90 degrees of the 12 and so on. You can revisit the clock at any time to check its right or make any adjustments.
You can also use your body for similar effect and watch the difference in the size of the shadows that are cast throughout the day, depending on the sun’s position in the sky.
What they will learn: tracking the sun is the oldest form of time telling. The sun’s position and the shadows it casts help children learn about time and the earth’s rotation. Children are fascinated by shadows and how they change throughout the day, which is why this works so well.
5. Milk plastic
What you need: 250ml of milk, white vinegar, a sieve and a bowl. You can also use food colouring if you wish.
Challenge: heat a cup of milk, approximately 250ml, until steaming. Add 1.5 tablespoons of white vinegar and stir until lumps begin to form. Leave the mix to cool, then sieve over a bowl, retaining the lumpy mixture. Squeeze out as much water as possible and shape. Once ready, leave it to dry for 24 hours.
You can also experiment with colour by adding food colouring to the milk, before adding the vinegar.
What they will learn: explore how different materials and chemicals interact and the impact of heat on them. You can also add lemon juice to the milk, instead of vinegar to create buttermilk which is great for baking scones.
6. Invisible ink messages
What you need: half a lemon, paper and a thin paintbrush or cotton bud.
Challenge: squeeze half a lemon into a small bowl. With a thin paintbrush or cotton bud, allow the children to write a message or draw a picture with the lemon juice. Leave to dry for around an hour – the paper will crinkle a little when it’s dry. To reveal the message, you need a heat source such as a hairdryer to heat the sheet and reveal the message.
Make the activity more enjoyable by designing a treasure map and let the children enjoy finding it.
What they will learn: it may seem like magic to children, but its simple chemistry. Lemon juice is an acid but also contains water and sugar. Its normally clear in colour so we don’t see it, but when it is heated, the sugars in the lemon have a chemical reaction and turn brown.
7. Straw rockets
What you need: A4 paper, some straws and some tape.
Challenge: grab an a4 sheet of paper and fold in four and then cut along the lines so you have four pieces of equal size. Wrap one piece of paper around the end of a straw, tape into place. Fold the top of the paper down to cover the opening of the straw and tape down. Now blow into the straw and see how far your rocket shoots.
You can be as creative as you like with the paper and could stick on a rocket shape or decorate however you desire.
What they will learn: Your breath is the force that propels it forward and its gravity that pulls the rocket down. You can try using different rocket lengths and shapes to see the impact on its flight.
Remember, safety is of the utmost importance and we’d recommend doing all these activities with adult supervision.
Don’t forget to share your creations with us on social media at @nationalgriduk or DM us on Instagram.